|
Quotation of the Week:
"We may brave human laws, but we cannot resist natural ones."
— Jules Verne |
| |
 |
| |
 |
| Long Island's largest selection of chimineas! Keep the bugs away and roast marshmallows with the kids this summer! |
| |
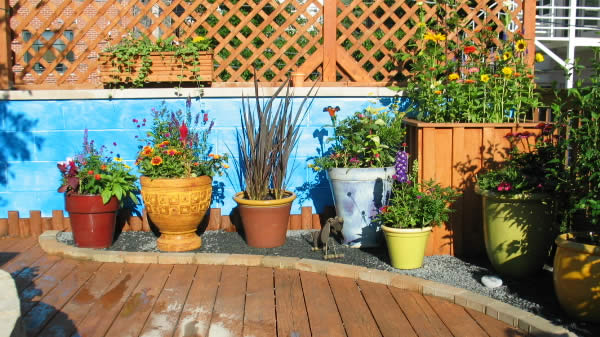 |
| Patio Planters, Starting at $29.99 |
| |
|
| 5 More Mistakes Made by the New Gardener |
1. Planting too deep:
All trees, shrubs, perennials and annuals (that means everything) should be planted at the same level as they were in the container they came out of.
Having said that, there may be an instance, now and then, when a plant in a container has some exposed roots because of soil erosion caused by watering the plant; of course, in this case you can cover the exposed roots.
DO NOT, however, raise the soil up around the trunk or the main stem(s) of the plant. This can cause the bark there to rot, eventually causing the plant to die.
If, for some reason, you can't plant at the same level as the soil in the container, it is all right (and in some soils, like heavy clay, preferable) to plant it a little high.
There are a couple of plants (tomatoes and marigolds come to mind) that you CAN plant deep; these two examples will actually develop roots along the buried part of the stem.
By the same token, there are a couple of plants that require being planted a little high (I'm thinking camellias and azaleas). But if you're a new gardener, just keep it simple at first and plant most everything at the same level it was in the container - you won't go wrong.
2. Removing plants that are dormant because they look dead:
As you probably already know, there are trees and shrubs that keep their leaves year-round (these are called "evergreens") and those that lose their leaves in the winter (known as "deciduous").
Some of the deciduous kinds can look notoriously dead when they have no leaves; also, some deciduous trees and shrubs break dormancy later than others. Before you give up on your plant and decide to give it the ax, perform a simple test.
With your fingernail (on plants with softer bark), a paring knife or the blade of a pruning shear nick a very small area of the bark of the plant in question. If it is alive, you will see green right under the nicked bark.
There are also evergreen perennials and those that die to the ground in the winter (AKA "herbaceous"). These herbaceous types will re-grow in the spring from the same root.
Although there are many, one example of an herbaceous perennial is Gloriosa Daisy. Don't be in a hurry to dig up and discard a perennial that dies to the ground.
As with the trees and shrubs, some send up new growth earlier than others; this can also depend on how cold or warm the preceding winter was and how early spring breaks, both of which can vary from year to year.
3. Applying too much fertilizer or fertilizing when the plant is stressed for water:
If you want your plant to grow really fast, the way to do it is to feed it more than the package recommends, right? WRONG!!!
Too much fertilizer is actually worse than not feeding your plant at all; neither scenario is good, but an over-fertilized plant will die a lot quicker than an under-fertilized one.
Too much fertilizer will burn your plant and, depending on the amount you gave it can kill it within a day or two. If you have accidentally fertilized a plant too heavily try to scrape away the excess, if possible.
Then apply a lot of water, to try to dilute the fertilizer and wash it out of the root zone of the plant. This must be done as soon as possible. It is easier to burn a plant with granular fertilizer than it is with liquid fertilizer.
Another no-no is fertilizing your plant when it is dry. When fertilizer is applied to a plant, water is given immediately thereafter so the plant can draw up food. When an extremely dry plant is fertilized, it draws up the water (and the fertilizer) much more rapidly than it normally would; this results in a burn.
Make sure your plant is moist and not stressed for water before you fertilize it.
4. Using a weed-eater around the trunks of trees:
The results of this practice are so widespread that there is now a commonly-used name for it: "weed-eater disease". It is really tempting (probably because it's so much faster) when trimming grass around the trunks of trees to grab the trusty ol' weed-eater instead of the grass shears.
Problem is, some trees (especially those with thinner bark) can be killed by this practice.
Directly under the bark of the tree is the cambium layer; if this is damaged, everything above it will die. If the whole circumference of the trunk is damaged, the whole tree will die.
While some trees have thick enough bark to withstand the ravages of the weed-eater, why take the chance?
5. Pruning (some) spring-flowering shrubs at the wrong time of the year:
This gets a little complicated, but we'll try to keep it fairly simple. Some flowering shrubs bloom on new wood and some bloom on old wood.
The most common time to prune things is in the winter or early spring, depending on where you live. If your shrub blooms on new wood, this won't be a problem.
But some flowering shrubs (like lilacs) bloom on old wood. What this means is that they start forming their flower buds in the summer of the year before they bloom (even though you can't see them yet).
You can see where winter or spring pruning on a shrub like this would create a problem. The problem is, you won't have any flowers the following spring.
The time of year to prune this type of shrub is immediately after it's finished blooming. If you are in doubt about when to prune your flowering shrub, just stop by and ask us!
|
|
| |
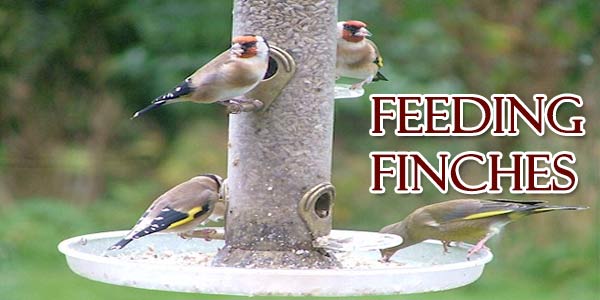 |
Nature exists to be enjoyed and treasured. And there is so much entertainment value in watching the birds flocking to your bird feeders that the easy effort of cleaning and filling the feeders is offset by the pleasure you will experience in watching the antics of these avian acrobats.
Finches, for example, come in a wide variety, are gregarious, and tend to feed in flocks. Along with the American Goldfinch (Carduelis tristi), the House Finch (Carpodacus mexicanus), the Lesser Goldfinch (Carduelis psaltria) and Lawrence's Goldfinch (Carduelis lawrencei), there are several northern finches which migrate into the lower U.S. when their food sources become scarce during winter; they are the Evening Grosbeaks, Pine Siskins, Common Redpolls and Purple Finches (Carpodacus purpureus).
For maximum visual enjoyment, place out multiple feeders in a sunny spot, preferably sheltered from weather by a copse of trees or bushes. The latter also provides a handy hiding spot if danger threatens. Provide both food and water; finches adore niger, a black seed tiny and light that requires a special feeder such as a yellow seed sock, or a tubular hanging feeder specially designed to hold niger.
Along with the above considerations when hanging your feeders, be sure to place them where you will be able to see them easily. Finches can become quite tame, and will not spook if you're a mere two feet away, on the other side of the window, watching while they eat. These bubbly singers mix chatter with their birdsong.
For other styles of bird feeders, the hands down favorite bird seed is the black-oil sunflower (as opposed to the grey and white striped sunflower seeds sold for people) which is high in oil content, and softer shelled, therefore easier to crack open.
It will attract many types of birds including woodpeckers, chickadees and jays along with the finches. Parent house finches will bring their young to backyard feeders shortly after fledgling where for the first couple of days they shell the seeds for their newborns.
As a further attractant for house finches, plant birch trees, marigolds, zinnias, and sunflowers.
Scatter dove and quail food on the ground for the quail, doves, sparrows and finches that have no problem at all with feeding on the ground. Multi-tiered feeding will only enhance your delight when watching your new friends.
And they do become friends, as the same birds will return to your feeders. Do not fear that yours are the only ones they visit; finches in particular follow a daily circuit of feeders and wild food patches.
However, once you have begun feeding the birds, for your own satisfaction, and as a reliable food and water source, keep up with the feeding, ensuring that the feeders are kept clean and filled.
It's the least we can do for the pleasures they afford us in return.
|
| |
 |
Your lawn needs to breathe, just as we do. We frequently forget that plants incorporate oxygen into their life cycles, just as we do. So, whether you're a novice gardener, or an experienced one, remember this word: aeration.
Basically, it's poking holes in your lawn so that soil that has become compacted is loosened, increasing its nooks and crannies that absorb water, air, and nutrients.
Aeration also stimulates root growth, reduces water runoff, and increases the lawn's drought tolerance, all of which improve the overall health.
Soil compaction causes turf deterioration, and occurs in common situations, such as when we walk on our lawns, and when we mow them; the first 2 to 3 inches of soil suffer the most. For warm climate lawns, which are primarily made up of Saint-Augustine grass, Zoysia grass, and Buffalo grass, it is best to aerate in late spring or early summer.
Thick lawns should be aerated on a regular basis, usually every year. If you do so, your lawn will be greener, easier to maintain, and will suffer from fewer pest problems and disease.
Now that we've discussed the "why" of aeration, let's talk about the "how". If your lawn area is manageably small, push a spading fork into the grass to the depth of 4", and rock it back and forth, thus loosening the soil.
However, this is rather labor-intensive for a normal sized lawn, so we suggest that you rent a power-driven core aerator (or aerifier) at your garden supply center.
The working parts of these machines are spoon-shaped tines, or hollow tubes, and as the tubes are driven into the lawn, cores of soil are removed and strewn across the turf. Leave these cores on the grass and rain will naturally dissolve them over the course of a few weeks.
If the rain isn't present, run the sprinkler! You may also speed up their disappearance by lightly raking the cores into the lawn, first in one direction, then in a perpendicular motion.
Your lawn will thank you.
|
| |
 |
What You'll Need:
- 1/2 cup all-purpose flour
- 1/2 cup sugar
- 1 tsp. baking powder
- 1/2 tsp. salt
- 1/2 cup 2% milk
- 4 tbsp. butter, melted
- 2 cups fresh or frozen sliced, peeled peaches, thawed
- 1/2 cup fresh or frozen blueberries, thawed
Step by Step:
- In a small bowl, combine the flour, sugar, baking powder and salt.
- Combine the milk and butter; stir into the dry ingredients until smooth.
- Pour into an 8-inch square baking dish coated with nonstick cooking spray.
- Top with peaches and blueberries.
- Bake at 350º for 30-35 minutes or until fruit is tender.
- Serve warm with vanilla ice cream if desired.
Yield: 4 servings.
 |
|