|
Quotation of the Week:
"The richness I achieve comes from Nature, the source of my inspiration."
- Claude Monet
|
| |
 |
| |
 |
Long Island's largest selection of chimineas!
Keep the chill of autumn at bay while your family and friends are over to play! |
| |
 |
The Gift Shop at Acer's carries a Full of Range of Unique Gifts, including Custom Silk Arrangements, Lifetime Candles, and Gardening Accessories. We also have a Full Line of Seasonal Decor that will have your home radiating the spirit of Autumn. |
| |

Click here to Print |
| |

Click here to Print |
| |
|
We all love to see daffodils showing their faces in spring. Customers come rushing in wanting to plant the bulbs of yellow flowers. But we are forced to tell them, "Sorry, it's too late." Fall is the time to plan ahead for spring bulb color.
Tulips, crocus and daffodils are the traditional standby bulbs. But for those that like the unusual, there are many spectacular varieties to choose from. They can be layered in containers or in your flower bed so that the colors just keep popping up. Crocus are the earliest blooming. Throw them into a flower bed and plant them where they land. Tulips are great in containers to show off your favorite pot in early spring. For a great show and color display, plant 8-10 daffodil bulbs in the same large hole.
Lilies, narcissus and hyacinths need to be planted in the fall as well. Don't forget that hyacinths and Oriental lilies are fragrant. Plant them where your nose as well as eyes can appreciate their beauty.
And last but not least, fall is the time to plant garlic. Planning ahead for a summer garlic harvest requires putting the bulbs in the ground in the fall. For a mild flavor try elephant garlic. The bulbs are larger but just as easy to grow as regular garlic.
Don't be disappointed when your neighbors have daffodils and crocus popping up in the yard next spring and you have bare ground. Plan and plant ahead! Choose your bulbs now and plant in the fall.
|
| |
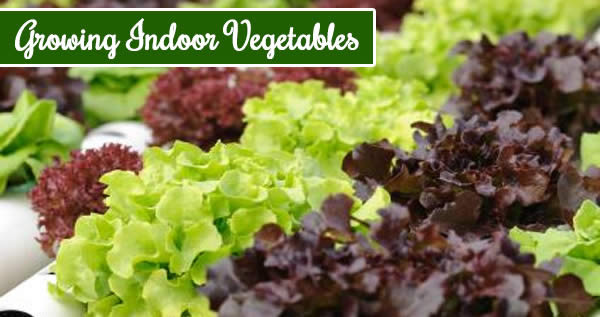 |
If you're like many home vegetable gardeners, cold winter days can leave you longing for the taste of fresh, homegrown vegetables grown the previous summer.
What most people don't know is that a number of vegetables can be grown successfully indoors during the winter months.
While you may not be able to grow larger vegetables such as beans, corn, cucumbers, squash, or pumpkins, smaller vegetables such as cherry or patio tomatoes, green peppers, miniature eggplant and especially salad greens will perform quite well and provide a sizable harvest if taken care of correctly.
The key to any indoor winter vegetables garden is location and lighting. Place your vegetables in a southern facing window that gets at least 8-12 hours of sunlight per day.
If that is not possible, you will need to hang a grow light 6-9 inches above each plant and monitor the space between the plant and the light, moving the light up as your plants grow taller.
If relying on natural window light, make sure to also rotate your containers at least once per week in order to help your plants grow evenly.
Start your plants in seed trays and then transplant them to window boxes or other larger containers once the plants become rooted. Use a good quality potting soil and make sure the containers you use have drainage holes. If you use water trays under your pots, make sure to check them after watering and drain any standing water in them.
Maintain a room temperature between 55 and 70 degrees. Feed with a water soluble plant food every 2 weeks, so that your plants will get the nutrients they need to produce. Wait to water until the soil surface becomes dry. Overwatering kills more plants than underwatering.
Most vegetables are pollinated by wind, so the use of a small fan will help move the pollen around from branch to branch and also help your plants survive the stuffy air conditions that can occur indoors in winter. If no pollination takes place, use a tiny paint brush (a watercolor brush works well) and dust the individual flowers weekly until they set fruit. |
| |
 |
So, you've made your annual fall pilgrimage to the pumpkin patch and you've brought your acquisitions home. You've carved the jack-o'-lanterns and even made a few pumpkin pies (from scratch, yet!). Ho, hum - there must be more to fall decorating than this, right?
You're in luck--there is! With that same knife and scoop you used for the jack-o-lantern, you can create a professional centerpiece for the fall table! Here's how:
Buy a small to medium-sized pumpkin that is tall enough to hold your bouquet.
- Using a knife, cut a circle around the stem the desired size of your future vase's opening. Set aside the top for later use.
- Scoop out the pulp and seeds and scrape the inside of the pumpkin so it is smooth and clean.
- Set your pumpkin out to dry. Choose a well-aired spot out of the direct sun.
- Leave it there until the inside of the pumpkin feels dry; this may take a day or two.
- Cut a piece of florist's foam small enough to fit through the hole at the top of the pumpkin; soak it well and place inside of the pumpkin cavity OR
- You can place an empty coffee can, margarine container or glass vase inside the cavity of the pumpkin (which will be filled with water) to hold the flowers. If choosing this method, make sure the receptacle is stable (possibly use some sand in the bottom of the pumpkin to create a nest for the container). The advantage of using this method would be that the inside of the pumpkin would be kept drier, preventing mold.
- Arrange your flowers as desired, sticking their stems in the florist's foam (or container) for stability. Choose fall flowers such as chrysanthemums and asters combined with grasses, fall foliage and berries, if desired.
Use the pumpkin top, more fall foliage and berries around your pumpkin vase to finish the look.
If your vase will be a centerpiece for a festive holiday dinner, why not add to the fun? Place a pumpkin sticker under one of the guest chairs. At the end of the meal, whoever sat in that chair gets to take the vase home!
Click to print this article. |
| |
 |
What You'll Need:
- 1/3 cup all-purpose flour
- 1/2 cup packed light brown sugar
- 1/3 cup regular oats
- 1/4 teaspoon ground cinnamon
- 1/4 cup chilled butter or stick margarine cut into small pieces
- 3 tablespoons chopped walnuts
- 7 cups diced, peeled Rome apples (about 3 pounds)
- 1/4 cup maple syrup
- 1/2 teaspoon ground cinnamon
Step by Step:
- Preheat oven to 375ºF.
- Lightly spoon flour into a dry measuring cup; level with a knife.
- Combine flour, sugar, oats and 1/4 teaspoon cinnamon in a medium bowl; cut
- in butter with a pastry blender until mixture is crumbly. Stir in walnuts.
- Combine apples and remaining ingredients in a large bowl; toss well. Spoon the apple mixture into an 8-inch square baking dish or 1-1/2 quart casserole.
- Sprinkle with the crumb mixture. Bake at 375ºF for 45 minutes or until golden brown.
Yield: 9 servings

|
|