|
Quotation of the Week:
"The richness I achieve comes from Nature, the source of my inspiration."
- Claude Monet
|
| |
 |
| |
 |
| |
 |
Long Island's largest selection of chimineas!
Keep the chill of autumn at bay while your family and friends are over to play! |
| |
 |
The Gift Shop at Acer's carries a Full Range of Unique Gifts, including Custom Silk Arrangements, Lifetime Candles, and Gardening Accessories. We also have a Full Line of Seasonal Decor that will have your home radiating the spirit of Autumn. |
|
| |
 |
We will be returning to Standard Time on November 1. Remember to set your clocks back to 1 AM on Sunday at 2 AM. Or just reset them Saturday evening and enjoy that extra hour of sleep!
Smoke detector batteries should be changed yearly; the change to Standard Time is also a great time to change the batteries in your smoke detectors. Properly functioning smoke detectors save thousands of lives every year.
Click to print this article. |
| |

Click here to Print |
| |

Click here to Print |
| |
|
Although ponds need little routine maintenance, there are a few end-of-season tasks that are essential if you want to keep your plants and fish in good condition.
- Protect the pond from the worst of the leaf fall with a fine-mesh net. Anchor it just above the surface of the pond. This is not practical for a large pond, but it is useful for a small one. Remove the leaves regularly, and eventually take the netting off.
- If you are not able to cover your pond with a net, or don't like the appearance of one, use a fish net or rake to remove leaves regularly — not only from the surface, but from below the surface as well. Too many leaves in the water can pollute the pond.
- Submerged oxygenating plants, such as elodea, and rampant growers like myriophyllum, will eventually clog the pond unless you net or rake them out periodically. This is a good time to thin them by simply raking out the excess.
- Trim back dead or dying plants from around the edge of the pond, especially where the vegetation is likely to fall into the water.
- To divide overgrown water plants, first remove the plants from their containers. It may be necessary to cut some roots to do so.
- Some plants can simply be pulled apart by hand, but others will have such a tight mass of entangled roots that you need to chop them into smaller pieces with a spade.
- Discard any pieces you don't want for replanting, then pot up the others in planting baskets. Cover the top of the baskets with gravel to prevent soil disturbance.
|
| |
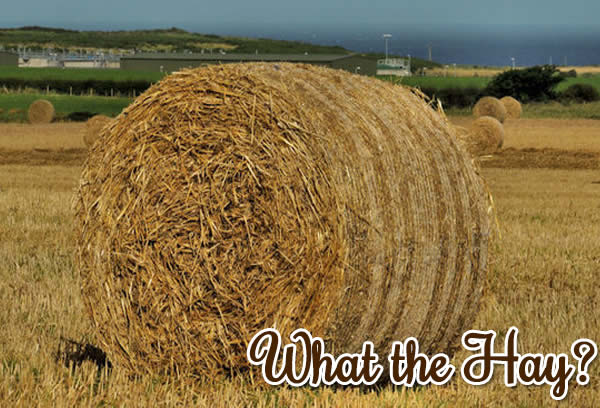 |
By Tamara Galbraith
You see them all over the place during autumn: bales of hay used as fall decor. But once all the pumpkins and scarecrows have been put away, what should you do with your bale of hay? (Hey, I made a rhyme!)
One option is: compost it. Hay is an excellent additive to the compost pile, and ideally, the heat of the pile will kill any weed seeds that might be languishing in the bales. Straw apparently breaks down even better than hay.
Hay and straw make great mulches and/or path covers too. First, though, break open the bales and let them sit outside for a couple of weeks.
This will allow wild birds to come in and munch on any weed seeds that might still be present. When spreading hay or straw bales on garden beds, be sure they don't stay too clumpy as you break the bales apart.
Lastly, hay bales left intact make great cold frames - a kind of mini-greenhouse - for housing tender plants during the colder seasons.
Simply arrange the bales in a tight square and place your plants inside, either right in the soil or in containers. A piece of plexiglass or an old window serves as the lid.
If you decide to give this easy cold frame a try, be aware that you must monitor the temperature frequently. Too much sun, and the plants inside will fry, so prop the lid open if necessary. When temperatures are going to drop below freezing, throw a blanket over the whole contraption and remove it when things stabilize.
No matter what, the hay will eventually break down, though, so keep an eye out for that -- as well as the occasional mouse looking for a warm, fluffy place to spend the winter. |
| |
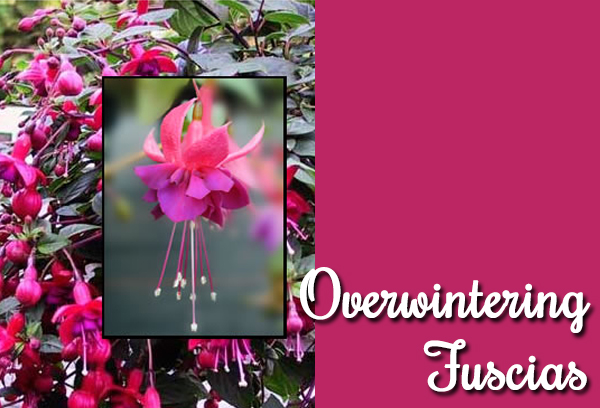 |
Most fuchsias are killed by frost, so unless you know that a particular variety is hardy enough to be left outdoors for the winter in your area, overwinter it in a frost-proof place.
If your fuchsias have been grown in pots during the summer, lift them to take into the greenhouse or into your house. If planted in open soil, lift with a fork and remove excess soil.
Pot up the plants individually, or in large boxes if you have a lot of plants, then put them in a frost-free place, such as in the greenhouse or on a light windowsill indoors.
Tidy up the plants by removing old leaves and pinching out any soft green tips. You must keep the plant cool but frost-free, with the soil almost dry.
To overwinter fuchsias outdoors, try this method: Instead of throwing the plant away, dig a trench about 30 cm (12 in) deep, line with straw, and then lay the plants on the straw. Cover the plants with even more straw and then return the soil.
Dig them up in spring, pot them up and keep in warmth and good light to start into growth again. If the winters are not too harsh, many of the plants should survive.
Some varieties are quite hardy and although some are strong enough for the roots not to be killed by frost in areas where winters are not too severe, in cold areas they may succumb without a little extra protection.
Leave the old stems on, even though these will be killed, as this may afford the plant some additional shelter. To reduce the depth to which severe frosts penetrate, cover the crown with a thick layer of bracken, straw or peat. Remove the protection in spring when the new shoots appear.
In mild areas, extra protection is not necessary for tough species such as fuchsia magellanica. |
| |
 |
What You'll Need:
- 1/2 - 3/4 cups sugar
- 2 tbsp. corn starch
- 6-8 peaches depending on size
Topping:
- 1 cup flour
- 1 cup oats (quick oats)
- 1 cup brown sugar
- 1/3 lb butter (about 1 1/2 sticks))
- * Ice cream
Step by Step:
- Cut flour into butter as you would in making a pie crust, until it is sandy in texture, with some small pea sized lumps remaining.
- Cut in brown sugar, and then oats. Mixture should be able to form clumps when squeezed together.
- Peel and cut fruit into wedges (about 6-8 peaches depending on size).
- Toss fruit with 1/2 - 3/4 cup sugar that has been mixed with 2 tablespoons of corn starch.
- Place in 9x13 pyrex baking dish, top with topping (clumps are nice!).
- Bake in preheated 375 degree oven (350 degrees if in convection oven).
- Bake for 20-30 minutes until fruit bubbles a lot.
- Serve with ice cream.
*You can substitute with berries when it's not peach season.
ENJOY!

|
|