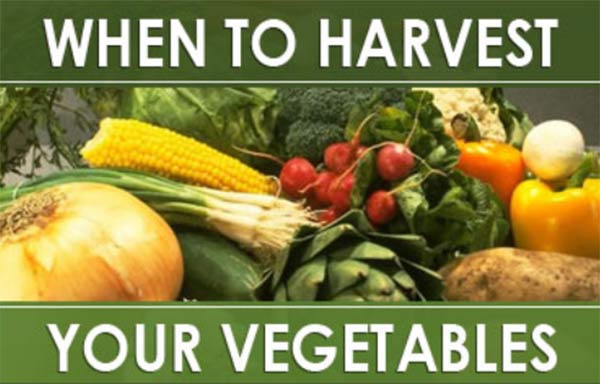
One of the most common mistakes made by beginning vegetable gardeners is harvesting the crop at the wrong time. Since ripeness varies according to planting time, the weather in any given year, the variety of the particular vegetable planted, and many other things, one can't just say, "Harvest this vegetable on August 1st." So we've gotten together a general guide for harvesting many commonly-grown vegetables.
We thought of restricting it to vegetables that grow easily here, or to summer harvest only--but greenhouse-growing is becoming more popular so we decided to do the long list.
Asparagus: Begin harvesting when spears are 6-10 inches tall and before heads open. Snap them off at ground level; new spears will continue to grow. Stop when the average spear diameter is less than 1/4 inch.
Beans (snap): Pick before you can see the seeds bulging. They should snap easily into two. Check daily, as they will get tough quickly.
Beans (lima): Pick when well filled, but not over-mature.
Beets: You can harvest and eat the green tops that you thin out of the rows. Beets are somewhat a matter of preference when it comes to the right size--most prefer a diameter of 1.5 to 2 inches--but they are ready any time after the shoulders come above the soil line.
Broccoli: We eat the unopened flower buds of broccoli, so check often as weather warms, and get them before they bloom (don't expect your heads to get to supermarket size). Harvest when the buds are about the size of a match head. Remove with a sharp knife; leave between 4 and 6 inches of stem.
Brussels Sprouts: Harvest when they are green, plump and firm (usually an inch or more in diameter). Harvest by twisting off or cutting the sprout from the stem.
Cabbage: Harvest cabbage when the head is firm and has reached adequate size, depending on the variety and growing conditions.
Cantaloupe (muskmelon): The color should change to beige and the fruit will 'slip' from the stem easily. You may be able to notice a sweet smell when ripe.
Carrots: Depending on variety, pull when about 3/4 to 1-1/2 inches in diameter. The top of the carrot will show at the soil line; you can gauge when the diameter looks right for your variety. If the diameter looks good, chances are the length is fine too.
Cauliflower: As with broccoli, your cauliflower heads will probably not get to supermarket size. Harvest when the head looks full and while the curds of the head are still smooth.
Chard (Swiss): Harvest as leaves become large enough.
Collards (kale and mustard): Harvest young plants or lower leaves on older plants. Leaves should be young and tender. Taste improves with cool weather.
Corn: Pick after the silks become brown. The kernels should exude a milky substance when pricked.
Cucumber: Check daily and harvest early (if harvesting for pickling, even earlier). Timing and length will vary with variety. The fruits should be firm and smooth. Over-ripe cucumbers can be very bitter or pithy, even before they start to turn yellow.
Eggplant: Slightly immature fruits taste best. The fruits should be firm and shiny. Cut rather than pull from the plant.
Garlic: The garlic tops will fall over and begin to brown when the bulbs are ready. Dig gently, don't pull, and allow to dry before storing. Shake off dirt rather than washing.
Kohlrabi: For the best texture, harvest once the kohlrabi "bulb" is between two and three inches in diameter. Too much larger than that and it will be tough and woody.
Leeks: Harvest leeks when they are about 1 inch in diameter.
Lettuce (Head): Harvest once the head feels full and firm with a gentle squeeze. Hot weather will cause it to bolt or go to seed rather than filling out.
Lettuce (Leaf): Harvest the outer leaves once the plant has reached about 4 inches in height. Allow the younger, inner leaves to grow. Leaf lettuce can be harvested in this fashion for quite some time. If seed stalks begin to form, harvest the whole plant immediately and refrigerate.
Okra: Harvest frequently--figure about 3-4 days from flower to mature pod. Err on on the immature side--the pods get woody and tough as they get older. Remove old pods, even if you missed one too long, so they'll keep producing. Wear gloves and long sleeves when harvesting; okra has small spines (they look like hairs) that can make you itchy--even 'spineless' varieties have some.
Onions: Onions can be dug once at least half the tops have ripened and fallen over. Allow the onions to dry in the sun.
Onions (bunching): Dig before bulbing starts or before they become too thick (over 1/2 inch diameter).
Peas (English): The pea pods should look and feel full. Peas are sweeter if harvested before fully plumped. Peas really need to be tasted (raw) to determine if they are sweet enough.
Peas (edible pod): Harvest when the pods are fully developed, but before seeds are more than half size. (You'll need to develop a feel for this one.)
Peppers (bell, sweet): Fruit should be full size but still green, firm and crisp in texture. If red fruits are desired, leave on plant until red color develops.
Peppers (chile): Fresh fruit should be full size, shiny green to slightly red, firm and crisp in texture. Dry red fruit should be allowed to turn completely red and dry on plant.
Potatoes (Irish): 'New' potatoes can be harvested when the tops start to flower. Carefully dig at the outer edges of the row. For full size potatoes, wait until the tops of the potato plants dry and turn brown. Start digging from the outside perimeter and move in cautiously to avoid slicing into potatoes.
Potatoes (sweet): before freezing weather. Cure under warm conditions (80°-85° F) for a week.
Pumpkins: Once the pumpkins have turned the expected color and the vines are starting to decline, they can be cut from their vines.
Radishes: Radishes mature quickly. Harvest as soon as they reach edible size. They will go quickly to seed.
Rhubarb: Delay harvest until second year after establishment. Established plantings (3 years) can be harvested for about 8 weeks. Harvest the largest stalks by grasping each stalk near the base and pulling slightly in one direction.
Rutabagas: The bulbs should be about 3 inches in diameter. Rutabagas can be mulched, left in the ground and dug up as needed. Cold weather improves their flavor.
Spinach: Spinach goes to seed quickly. Harvest by cutting at the soil line before you see a flower stalk beginning to shoot up. Or cut just below the crown for a one-time harvest.
Squash (Summer): Pick young and check often. The skins should be tender enough to poke your fingernail through.
Squash (Winter): Color is a good indicator of winter squash maturity. When the squash turns the color it is supposed to be, cut from the vine.
Tomatoes: For the best taste, harvest tomatoes when they are fully colored and slightly soft to the touch. Gently twist and pull from the vine. If your plant looks like it may be over-producing, you can also harvest some as they start to ripen and let them finish indoors. If you like fried green tomatoes, harvest as they reach full size (or just as the first color change begins, if you like them a bit less tart).
Turnips: The turnip shoulders should be about 1.5 to 3 inches in diameter at the soil line, when ready. Overripe turnips become woody.
Watermelons: The white spot on the bottom of the melon should change to yellow when ripe. Some people can hear a change in the sound made when the melon is thumped with a finger.